Finding the right monitor bracket can completely transform your workspace. It helps you achieve better posture, reduces neck strain, and keeps your desk organized. You’ll notice how much easier it becomes to focus when your monitor is positioned just right. A good bracket doesn’t just hold your screen; it gives you flexibility, comfort, and a cleaner setup. Whether you’re working or gaming, the right choice makes all the difference.
Key Takeaways
- ● Ensure compatibility by checking your monitor's size, weight, and VESA compliance before purchasing a bracket.
- ● Look for adjustable features like height, tilt, swivel, and rotation to enhance comfort and productivity.
- ● Choose the right installation type—clamp, grommet, or freestanding—based on your desk design and personal preferences.
- ● Utilize built-in cable management features to keep your workspace organized and free from clutter.
- ● Balance quality and affordability by setting a budget and prioritizing essential features for your needs.
- ● Read customer reviews to gain insights into the performance and reliability of the monitor bracket you're considering.
Compatibility
When choosing a monitor bracket, compatibility should be your first consideration. Not all brackets fit every monitor, so you’ll need to ensure the one you pick works perfectly with your setup. Let’s break it down into two key aspects: monitor size, weight, and VESA compliance, and how to check your monitor’s specifications.
Monitor Size, Weight, and VESA Compliance
Your monitor’s size and weight play a huge role in determining the right bracket. Most brackets come with specific size and weight limits. If your monitor exceeds these limits, the bracket might not hold it securely. Always check the product description or packaging for these details.
Another critical factor is VESA compliance. VESA (Video Electronics Standards Association) sets the standard for mounting holes on the back of monitors. Most modern monitors follow this standard, but it’s always good to double-check. Look for the VESA pattern on your monitor, which usually appears as a square or rectangular arrangement of screw holes. Common patterns include 75x75mm or 100x100mm. If your monitor isn’t VESA-compliant, you may need an adapter.
How to Check Your Monitor's Specifications
To find the right monitor bracket, you’ll need to know your monitor’s specifications. Start by checking the user manual or the manufacturer’s website. Look for details like screen size, weight, and VESA pattern. If you don’t have the manual, you can usually find this information on the back of your monitor. The model number printed there can also help you search online for the specs.
If you’re unsure about the weight, use a household scale to weigh your monitor. Knowing the exact weight ensures you pick a bracket that can handle it safely. For VESA compliance, measure the distance between the mounting holes on the back of your monitor. This step confirms whether the bracket will fit.
By understanding these details, you’ll avoid the hassle of buying a bracket that doesn’t work with your monitor. A little research upfront saves time and ensures a smooth setup.
Adjustability

When it comes to monitor brackets, adjustability is a game-changer. It determines how well you can position your monitor for maximum comfort and productivity. Let’s explore the key aspects of adjustability that you should consider.
Height, Tilt, Swivel, and Rotation
A good monitor bracket allows you to customize your monitor’s position. You can adjust the height to align the screen with your eye level. This simple change reduces neck strain and promotes better posture. Tilting the monitor forward or backward helps you find the perfect viewing angle, especially if you’re dealing with glare or reflections.
Swivel functionality lets you move the monitor side to side. This feature is great if you share your screen during meetings or need to switch between different workstations. Rotation, on the other hand, allows you to switch between landscape and portrait modes. If you work with long documents or code, this feature can be a lifesaver.
When choosing a bracket, check how smoothly these adjustments work. Some brackets offer precise control, while others may feel stiff or limited. Look for one that feels intuitive and easy to use.
Static vs. Dynamic Models
Monitor brackets come in two main types: static and dynamic. Static models hold your monitor in a fixed position. They’re sturdy and reliable, making them a good choice if you don’t need frequent adjustments. However, they lack flexibility, so you’ll need to set the position carefully during installation.
Dynamic models, on the other hand, offer a full range of motion. These brackets use gas springs or mechanical arms to let you move the monitor effortlessly. You can pull it closer, push it away, or reposition it throughout the day. This flexibility is ideal if you switch between tasks or share your workspace with others.
When deciding between static and dynamic models, think about how you use your monitor. If you prefer a set-and-forget setup, a static model works well. If you value flexibility and movement, go for a dynamic option.
Installation Options
Choosing the right installation option for your monitor bracket can make a big difference in how well it fits your workspace. The type of mount you select affects stability, ease of use, and how much desk space you save. Let’s dive into the most common options and what you should know about them.
Clamp, Grommet, and Freestanding Mounts
Monitor brackets typically come with three main installation styles: clamp mounts, grommet mounts, and freestanding mounts. Each has its own advantages, depending on your desk setup and personal preferences.
-
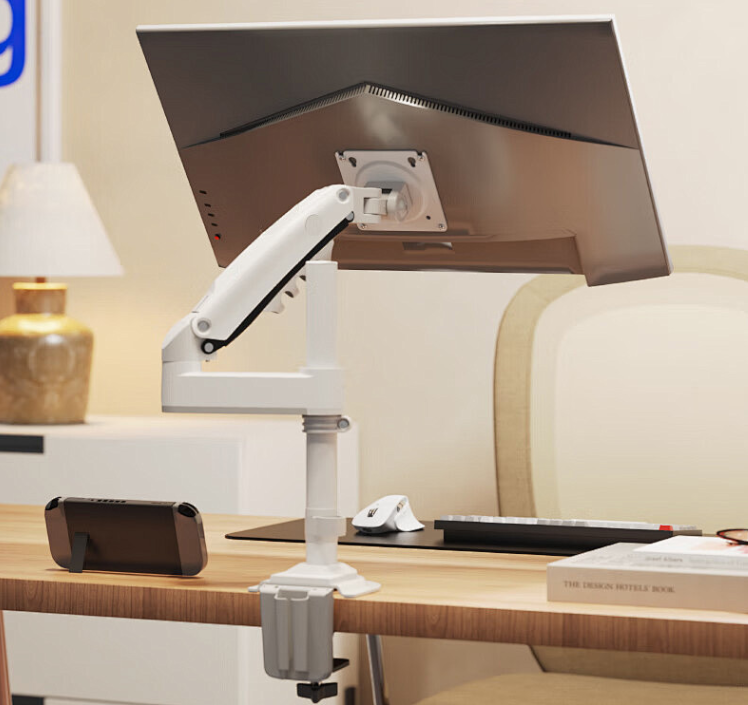
● Clamp Mounts: These attach to the edge of your desk using a sturdy clamp. They’re easy to install and don’t require drilling any holes. Clamp mounts work best if your desk has a solid edge and enough thickness to support the bracket. They save space by keeping your monitor elevated and off the desk surface.
-
● Grommet Mounts: These require a hole in your desk to secure the bracket. If your desk already has a cable management hole, you can use it for this type of mount. Grommet mounts provide excellent stability and are ideal for desks where clamps might not work. However, they involve a bit more effort during installation.
-
● Freestanding Mounts: These sit directly on your desk without needing clamps or holes. They’re the easiest to set up since you just place them where you want. Freestanding mounts are great if you want flexibility or if your desk isn’t compatible with clamps or grommets. Keep in mind, though, that they take up more desk space and might not be as stable as the other options.
When deciding between these mounts, think about your desk’s design and how much effort you’re willing to put into installation. Each option has its strengths, so pick the one that suits your needs best.
Ease of Installation and Desk Suitability
Installing a monitor bracket shouldn’t feel like a complicated project. Some brackets are designed for quick and simple setup, while others might require more tools and time. Before buying, check the installation instructions or reviews to see how user-friendly the process is.
Consider your desk’s material and thickness. Clamp mounts need a sturdy edge, while grommet mounts require a hole. If your desk is made of glass or has an irregular shape, freestanding mounts might be your safest bet. Always measure your desk and compare it with the bracket’s specifications to avoid surprises.
If you’re not comfortable with tools, look for brackets that come with all the necessary hardware and clear instructions. Some even include video tutorials to guide you through the process. A smooth installation saves you time and ensures your monitor stays secure.
By choosing the right installation option and ensuring compatibility with your desk, you’ll set yourself up for a hassle-free experience. A well-installed monitor bracket not only improves your workspace but also gives you peace of mind.
Cable Management

A clutter-free workspace starts with good cable management. When you’re setting up your monitor bracket, managing cables effectively can make a huge difference in how organized and functional your desk feels. Let’s explore how built-in features and a few simple tips can help you tame those wires.
Built-in Cable Channels and Clips
Many monitor brackets come with built-in cable management features. These include cable channels, clips, or sleeves that keep your wires neatly tucked away. Instead of having cables dangling everywhere, these features guide them along the arm of the bracket. This not only looks cleaner but also prevents cables from tangling or getting damaged.
When choosing a monitor bracket, check if it has these built-in options. Cable channels are often hidden within the arm, giving your setup a sleek and professional look. Clips, on the other hand, are external but still do a great job of keeping wires in place. Both options make it easier to route your cables without needing extra tools or accessories.
Built-in cable management also makes it simpler to adjust your monitor’s position. With the cables securely held in place, you won’t have to worry about them pulling or snagging when you move the screen. This feature is especially helpful if you’re using a dynamic model that allows frequent adjustments.
Tips for Organizing Cables Effectively
Even with built-in features, you’ll need a few tricks to keep your cables fully under control. Here are some practical tips to help you organize them like a pro:
-
● Label Your Cables: Use small tags or stickers to label each cable. This makes it easier to identify them when you need to unplug or rearrange something.
-
● Use Cable Ties or Velcro Straps: Gather loose cables together with reusable ties or straps. These keep everything bundled neatly and prevent wires from spreading across your desk.
-
● Route Cables Along the Desk Edge: If your monitor bracket doesn’t have built-in channels, use adhesive clips to guide cables along the edge of your desk. This keeps them out of sight and off the floor.
-
● Shorten Excess Length: If a cable is too long, coil the extra length and secure it with a tie. This reduces clutter and keeps your workspace tidy.
-
● Invest in a Cable Box: For power strips and bulky adapters, a cable box can hide the mess while keeping everything accessible.
By combining these tips with the built-in features of your monitor bracket, you can create a workspace that’s both functional and visually appealing. A well-organized setup not only looks better but also helps you stay focused and productive.
Budget and Reviews
When shopping for a monitor bracket, balancing your budget with quality is key. You want something that fits your needs without breaking the bank. At the same time, you don’t want to sacrifice durability or functionality just to save a few bucks. Let’s explore how to strike the right balance and why customer reviews can be your best friend during this process.
Balancing Quality and Affordability
Finding the sweet spot between quality and affordability can feel tricky, but it’s absolutely doable. Start by setting a clear budget. Decide how much you’re willing to spend before you even start browsing. This helps you narrow down your options and avoid overspending.
Next, focus on the features that matter most to you. Do you need a highly adjustable bracket? Or is a simple, sturdy design enough? Prioritize what’s essential for your setup. For example, if you’re looking for a dynamic model with smooth movement, you might need to invest a bit more. On the other hand, a static model with fewer adjustments could save you money.
Pay attention to materials and build quality. A cheaper bracket might seem like a good deal, but it could wear out faster or fail to support your monitor properly. Look for brackets made from durable materials like steel or aluminum. These tend to last longer and provide better stability.
Finally, keep an eye out for sales or discounts. Many retailers offer deals on monitor brackets during back-to-school or holiday seasons. With a little patience, you can often find a high-quality option at a lower price.
Importance of Customer Reviews
Customer reviews are a goldmine of information when choosing a monitor bracket. They give you real-world insights into how a product performs, beyond what the manufacturer claims. Before making a purchase, take some time to read through reviews on trusted websites or online marketplaces.
Look for patterns in the feedback. If multiple people mention that a bracket is easy to install or holds up well over time, that’s a good sign. On the flip side, consistent complaints about weak clamps or poor adjustability should raise a red flag.
Pay special attention to reviews that include photos or videos. These can show you how the bracket looks and functions in actual setups. You might even find tips or tricks from other users that make installation easier.
Don’t just focus on the positive reviews. Negative feedback can be just as valuable. It helps you identify potential issues and decide if they’re deal-breakers for you. For example, if a reviewer mentions that the bracket doesn’t work well with glass desks, you’ll know to avoid it if you have one.
By combining your budget considerations with insights from customer reviews, you can make a confident, informed decision. A little research goes a long way in ensuring you get the best value for your money.
Choosing the right monitor bracket can make a big difference in your daily routine. By focusing on factors like compatibility, adjustability, and installation options, you ensure a setup that fits your needs. Think about what matters most to you—whether it’s reducing neck strain or keeping your workspace tidy. A well-chosen bracket doesn’t just hold your monitor; it transforms how you work or game. Take the time to pick one that suits your style and priorities. You’ll notice the improvement in comfort and productivity right away.
FAQ
What is a monitor bracket, and why do I need one?
A monitor bracket is a device that holds your monitor securely and allows you to adjust its position. It helps you create an ergonomic workspace by positioning your screen at the right height and angle. Using a monitor bracket can reduce neck strain, improve posture, and free up desk space for a cleaner setup.
How do I know if a monitor bracket is compatible with my monitor?
To check compatibility, look at your monitor’s size, weight, and VESA compliance. Most brackets specify the maximum weight and screen size they can support. For VESA compliance, measure the distance between the mounting holes on the back of your monitor. Common patterns include 75x75mm or 100x100mm. If your monitor doesn’t meet these standards, you may need an adapter.
Can I install a monitor bracket on any desk?
Not all desks work with every type of monitor bracket. Clamp mounts need a sturdy desk edge, while grommet mounts require a hole in the desk. Freestanding mounts work on most desks but take up more space. Check your desk’s material, thickness, and design before choosing a bracket.
Are monitor brackets difficult to install?
Most monitor brackets are easy to install, especially if they come with clear instructions and all necessary hardware. Clamp and freestanding mounts are usually quicker to set up, while grommet mounts might take more effort. If you’re unsure, look for brackets with video tutorials or user-friendly designs.
What’s the difference between static and dynamic monitor brackets?
Static brackets hold your monitor in a fixed position. They’re sturdy and reliable but lack flexibility. Dynamic brackets, on the other hand, allow full movement. You can adjust the height, tilt, swivel, and even rotate the monitor. Dynamic models are ideal if you need frequent adjustments or share your workspace.
Do I need a monitor bracket with cable management features?
Cable management features help keep your workspace organized and clutter-free. Built-in channels or clips guide cables along the bracket, preventing tangles and damage. If you value a clean and professional-looking setup, a bracket with cable management is worth considering.
Can I use a monitor bracket for multiple monitors?
Yes, many monitor brackets support dual or even triple monitor setups. Look for brackets designed specifically for multiple screens. Check the weight and size limits for each arm to ensure they can handle your monitors. Multi-monitor brackets often include independent adjustments for each screen.
How much should I spend on a monitor bracket?
Monitor brackets come in a wide price range. Set a budget based on your needs. Basic static models are affordable, while dynamic brackets with advanced features cost more. Focus on durability and functionality rather than just price. A well-built bracket is a long-term investment.
What materials should I look for in a monitor bracket?
High-quality monitor brackets are usually made from steel or aluminum. These materials provide durability and stability. Avoid brackets made from cheap plastic, as they may not support your monitor securely over time.
How do I maintain my monitor bracket?
To keep your monitor bracket in good condition, check the screws and joints regularly. Tighten any loose parts to ensure stability. Clean the bracket with a soft cloth to remove dust. Avoid using harsh chemicals that could damage the finish. Proper maintenance extends the life of your bracket and keeps your monitor secure.
Post time: Dec-05-2024

